Jeep Wrangler JL Transfer Case Modification
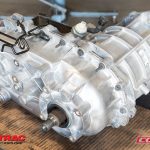
The 2018 Jeep Wrangler JL has many great, new features. It may be the most-capable Jeep Wrangler ever made. We dove right into this new model and built the first JL on 42s, named CODE1. Through our series of modifications which included Dynatrac ProRock axles and 42-inch tall tires, we ran across a situation where the transfer case may refuse to shift; specifically when the front axle is replaced with one that does not have front-axle disconnect (FAD).
The Jeep JL is equipped with a Magna transfer case. The transfer case uses a synchronizer to smooth shifts between high-range and low-range. Ironically, components of this synchronizer seem to be what keep the transfer case from shifting in certain situations.
By removing the synchronizers, blocker ring, detents, springs and check balls, we were able to resolve the issue.
While it’s too early for us to determine if all JL vehicles are affected when when adding larger tires or other modifications, in addition to aftermarket axles, we wanted to share this how-to article for those who run across the same issue.
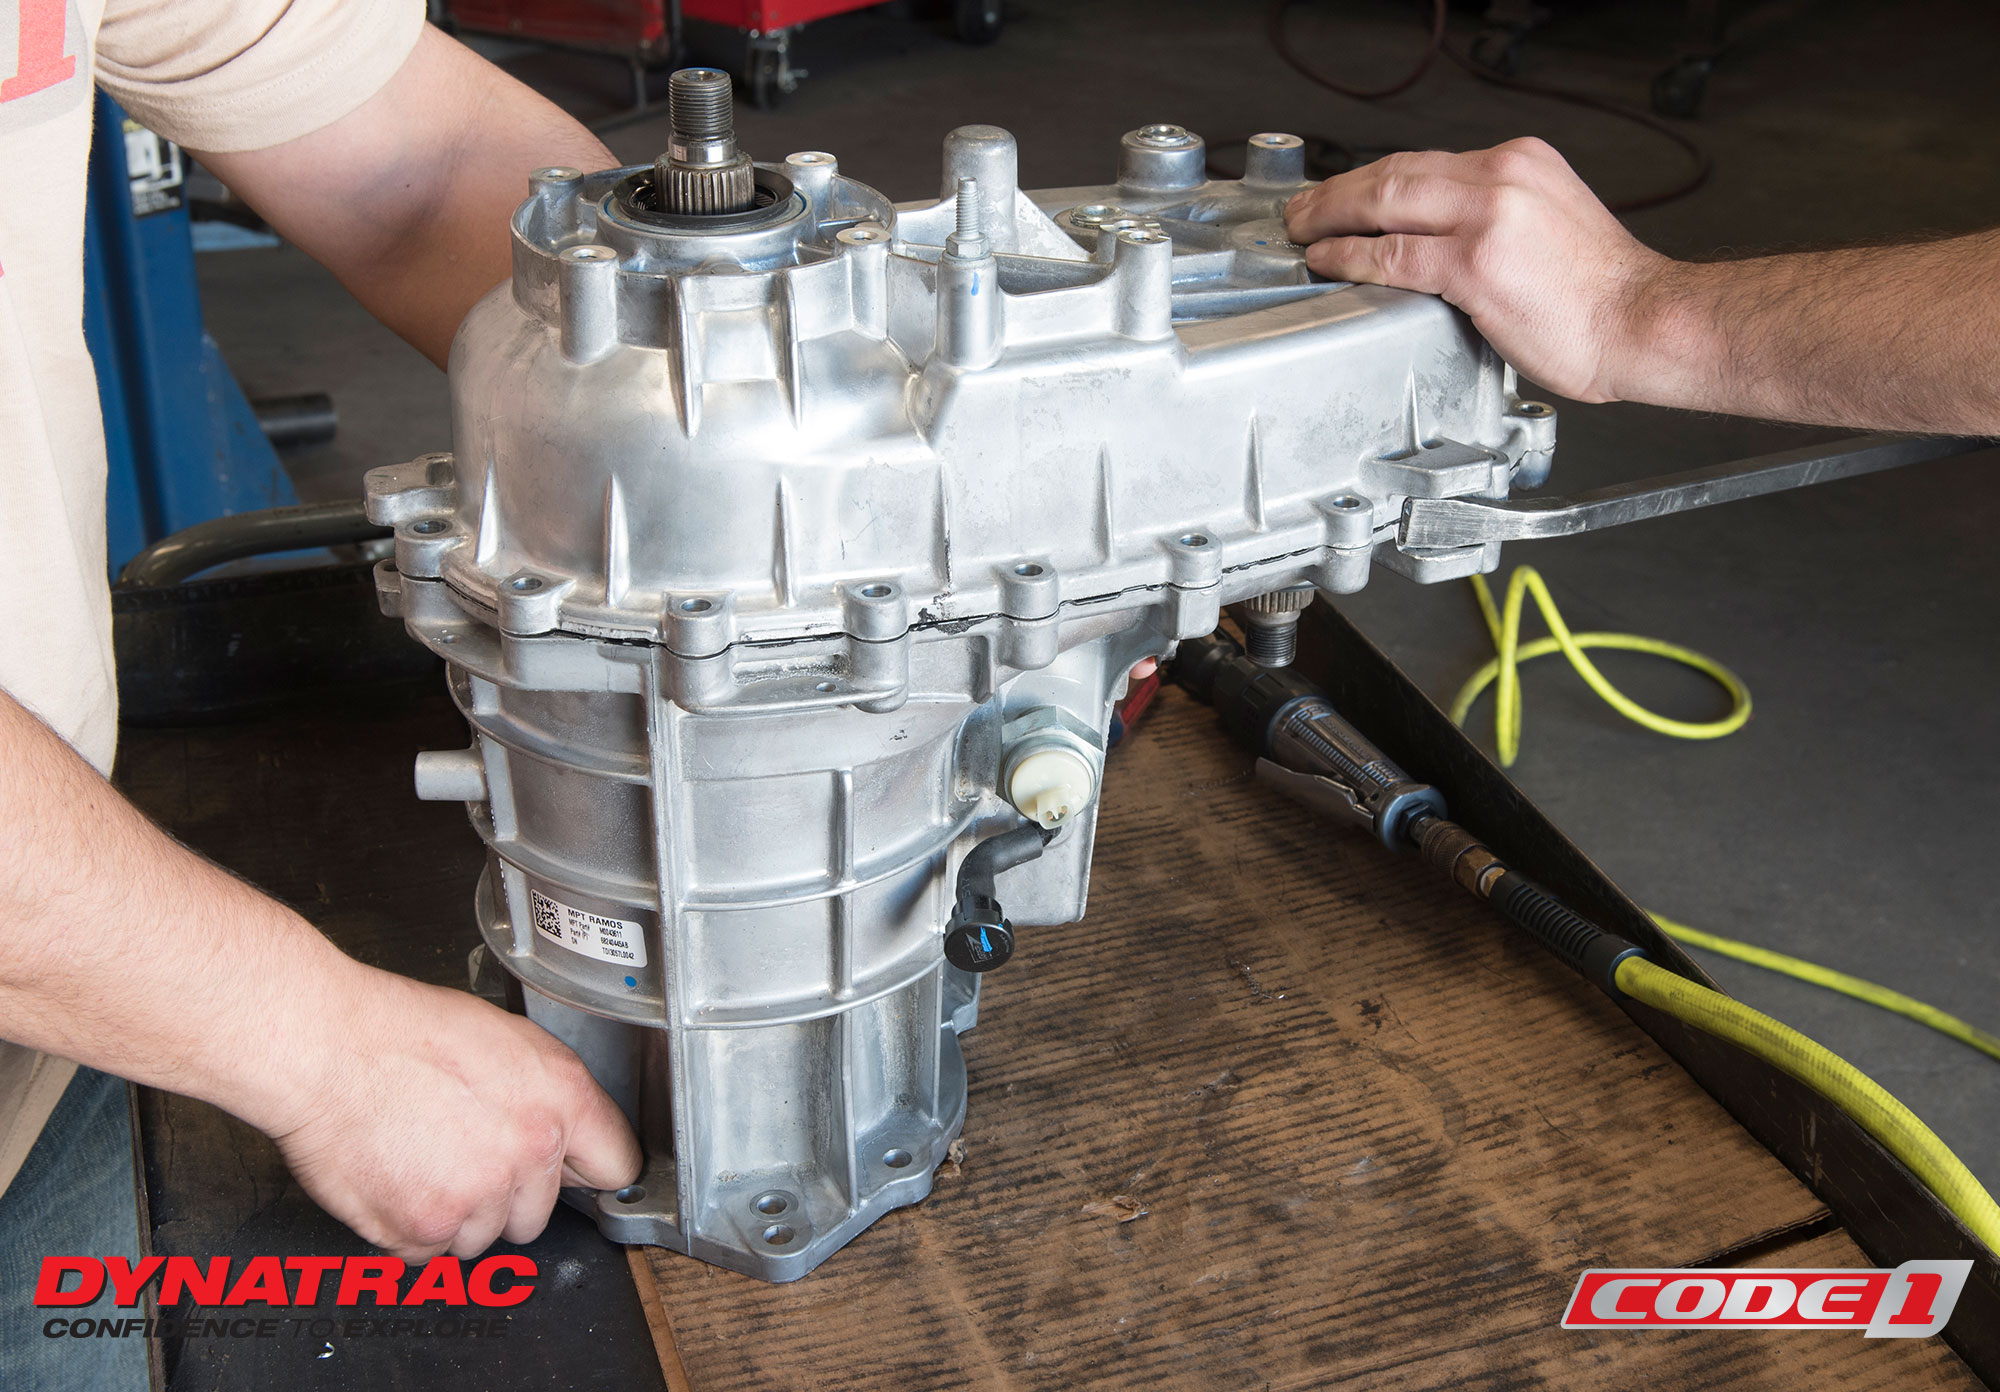
 To perform this modification, you will need to remove the transfer case from the vehicle and drain the fluid. You may be able to perform this modification without moving the transfer case from the vehicle, as long as you can separate the two halves of the case. If you remove the transfer case from the vehicle, the upper bolt on the driver side is behind a cooler and is extremely difficult to remove. We trimmed a 10mm wrench to fit on the bolt. With the transfer case removed from the vehicle, remove all of the bolts that hold the two halves of the case together.
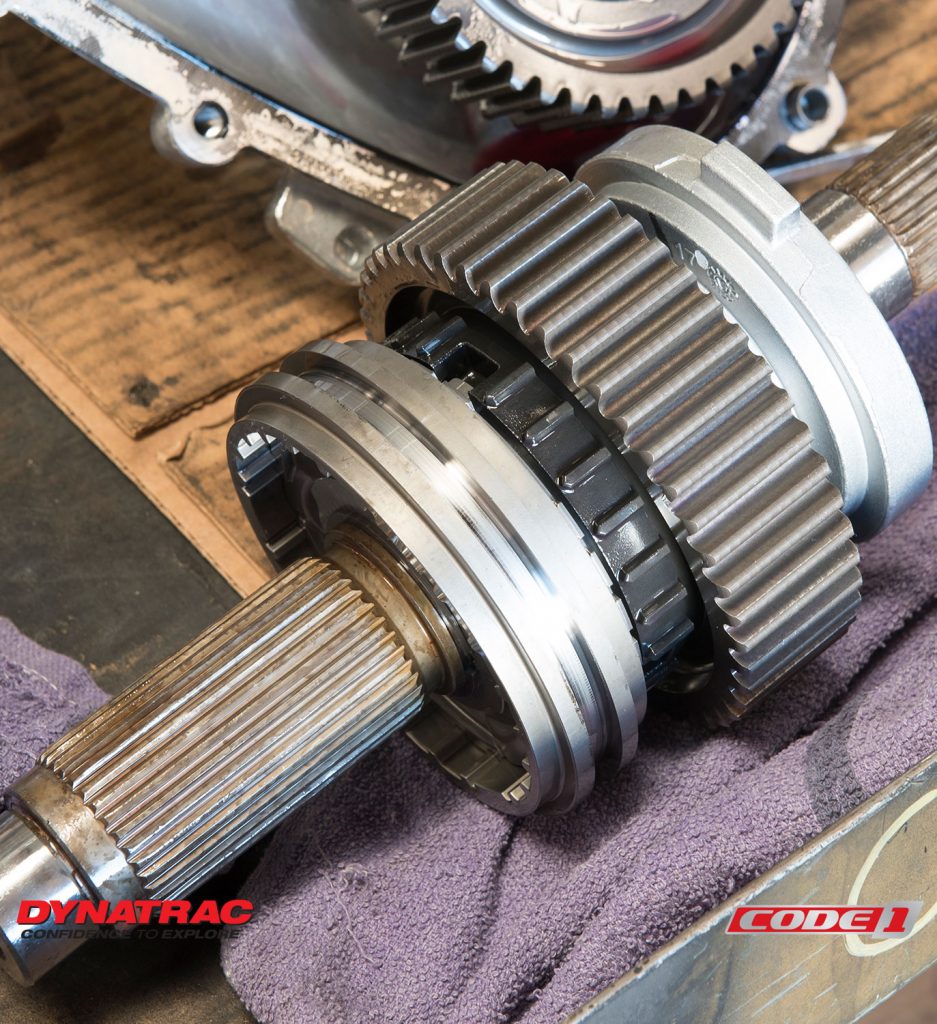 The shift fork and spring, as well as the mainshaft and drive chain will likely come out of the case when the two halves are separated. The mainshaft is the assembly that will require further disassembly.
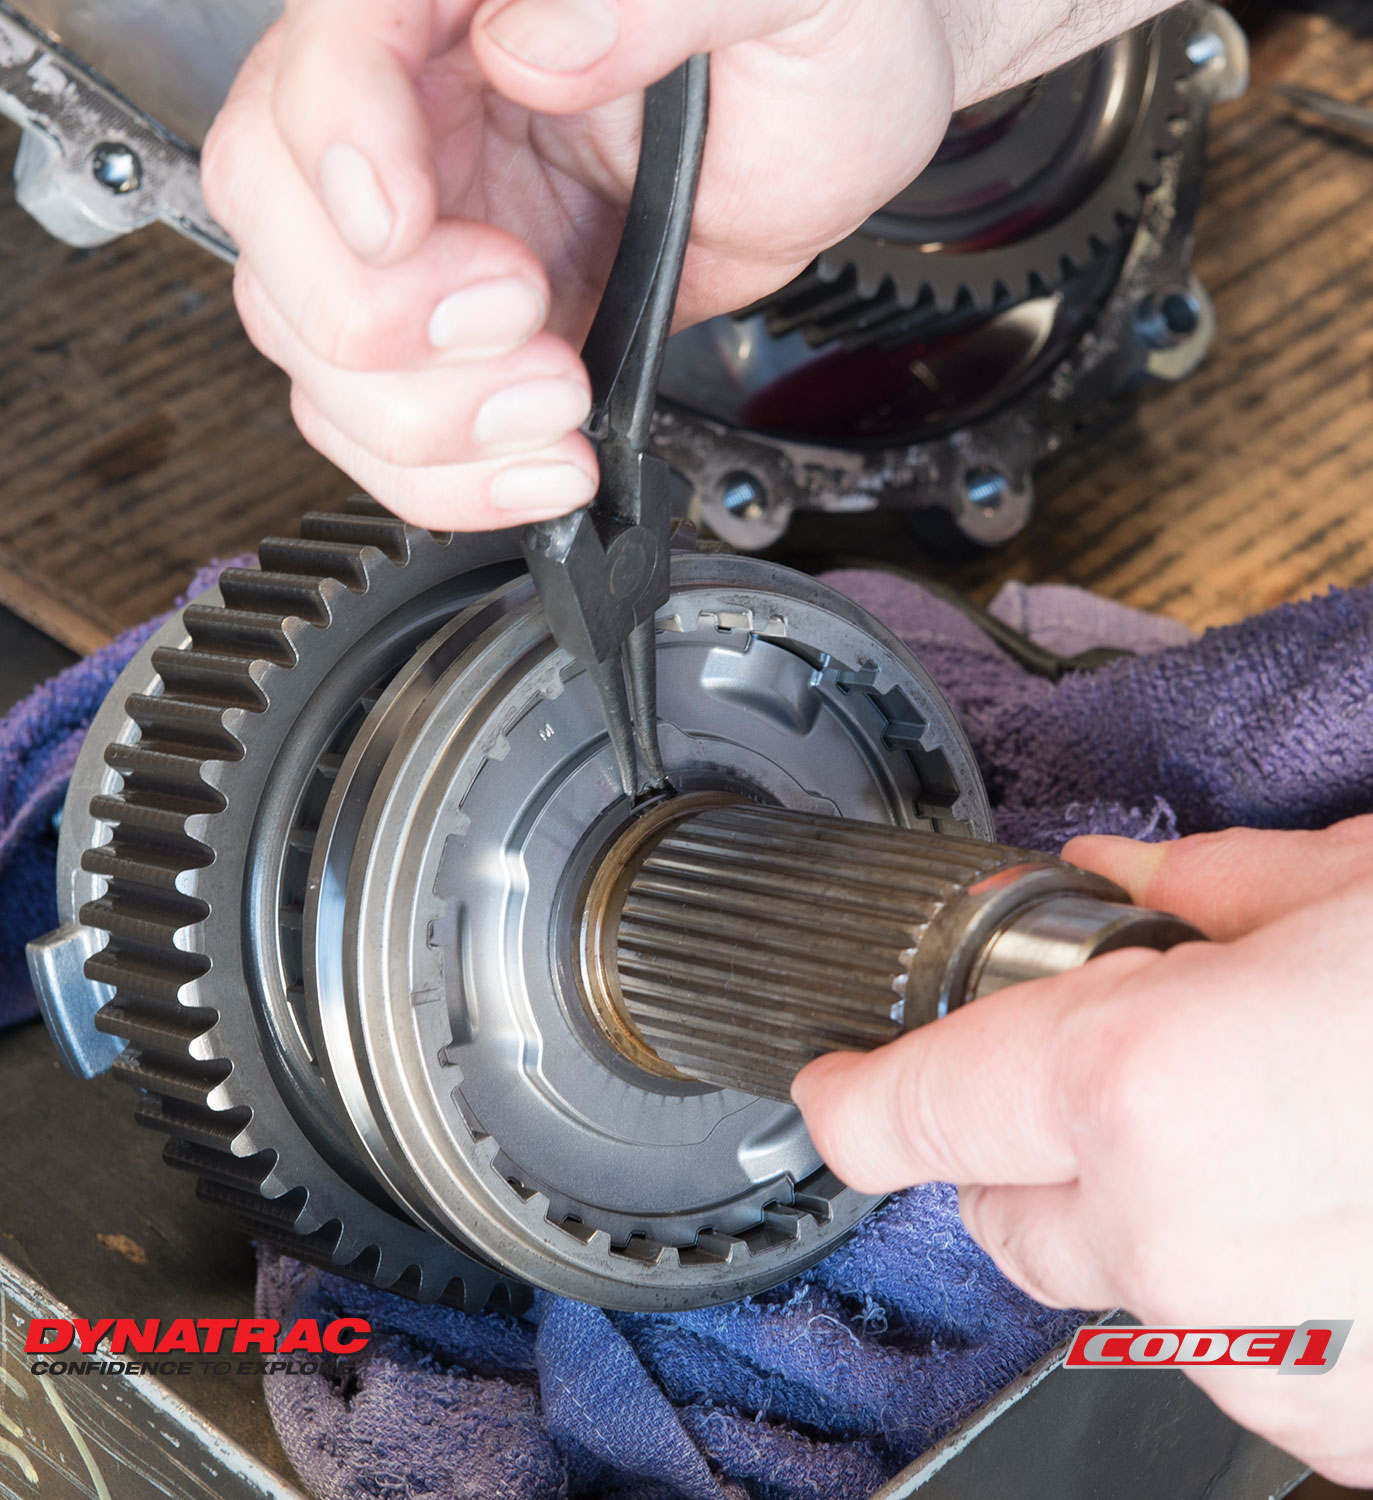
 Remove the C-clip that retains the synchronizer assembly on the shaft.
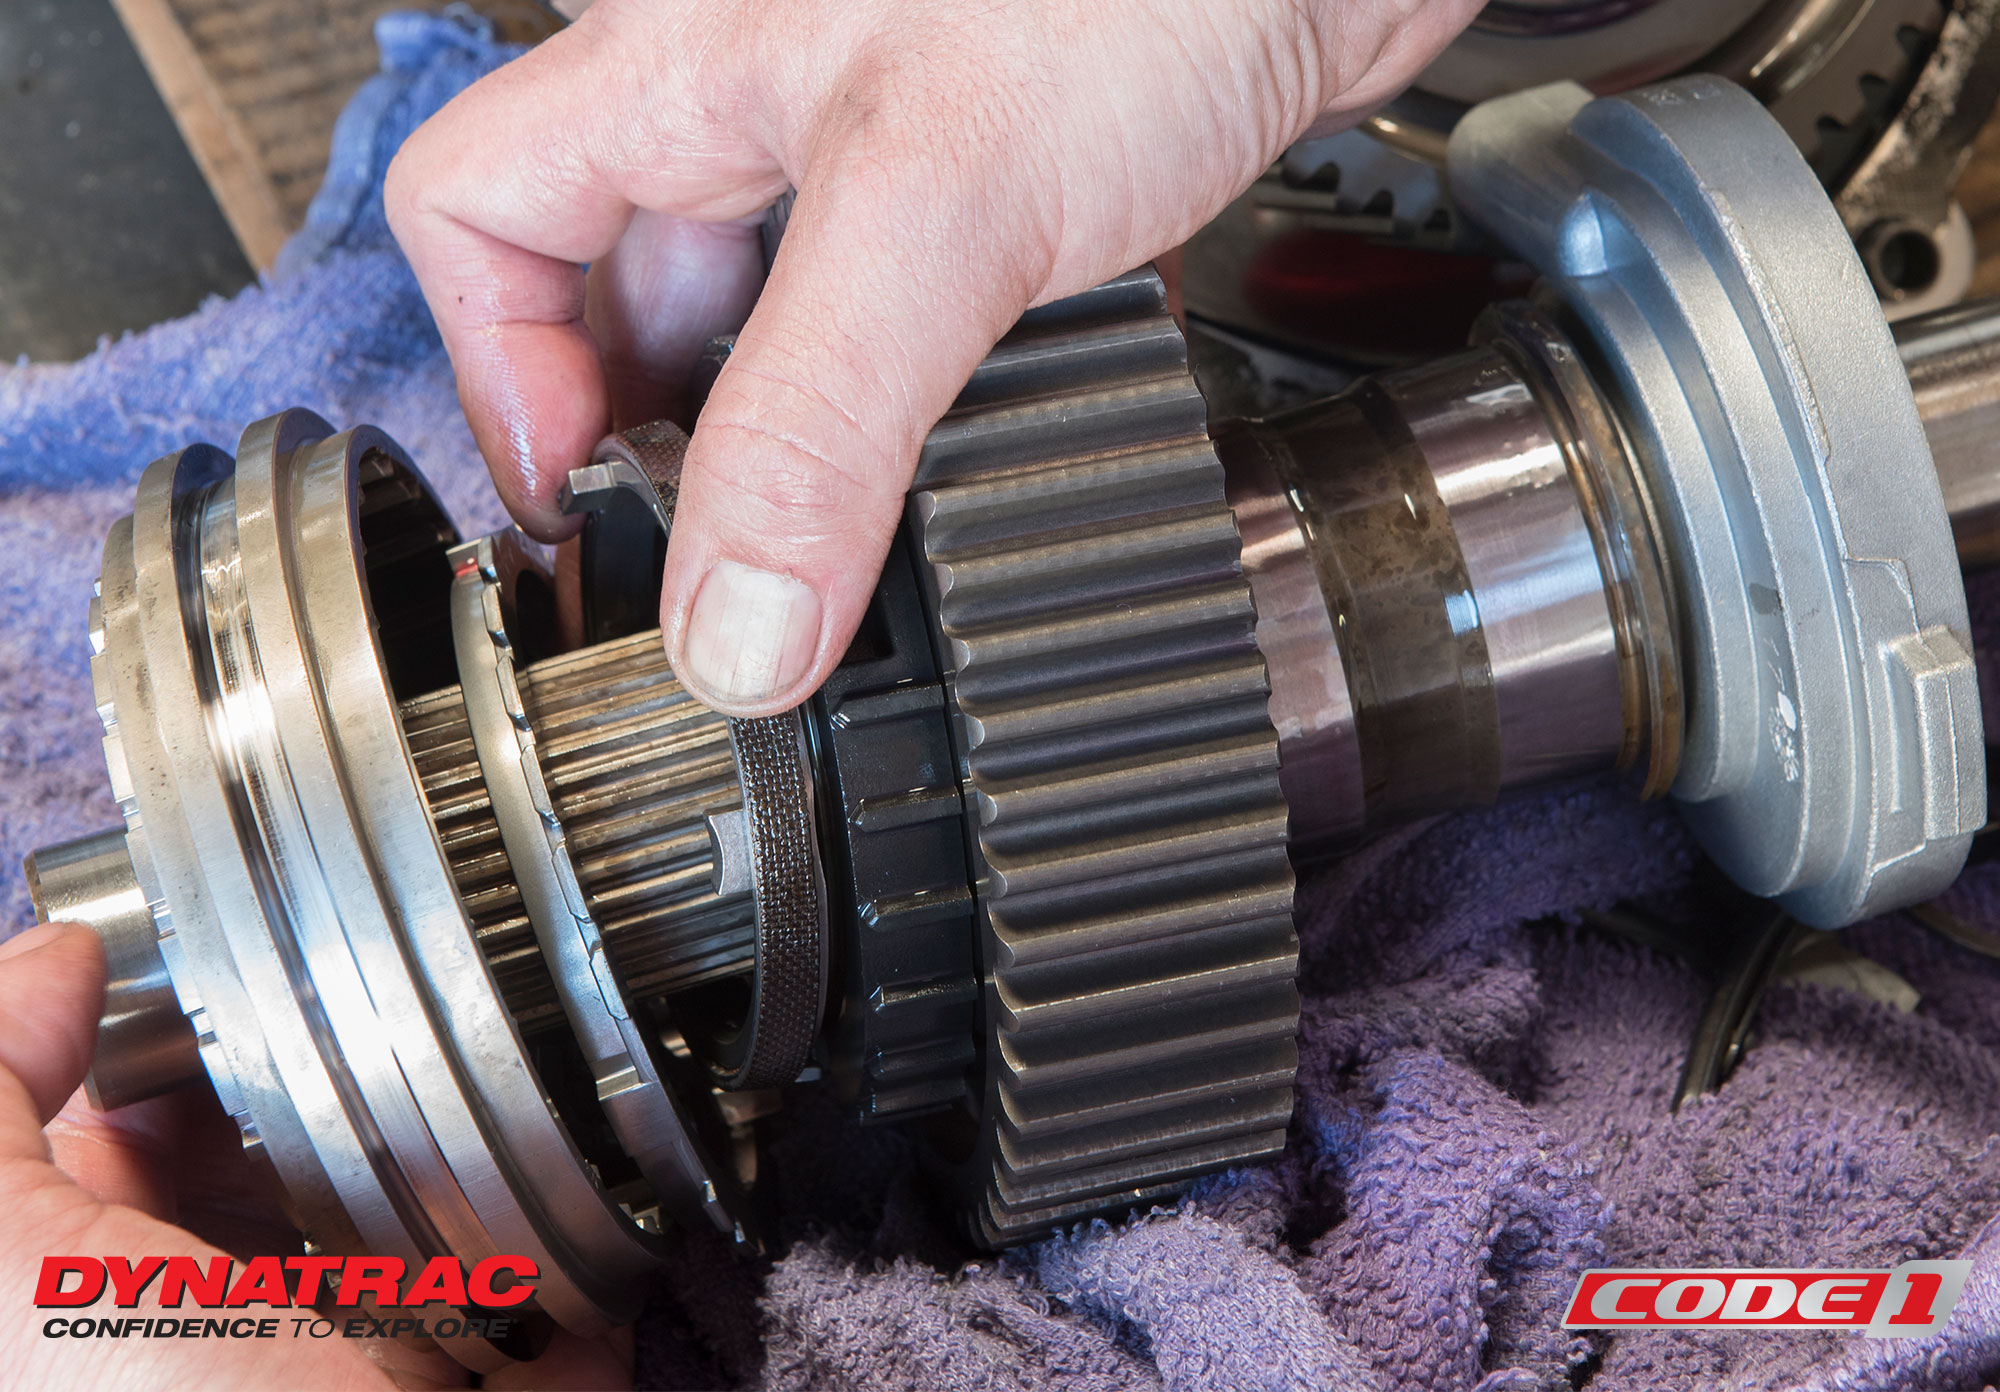
 Slide the sleeve, blocker ring, intermediate ring and engagement ring off of the shaft.
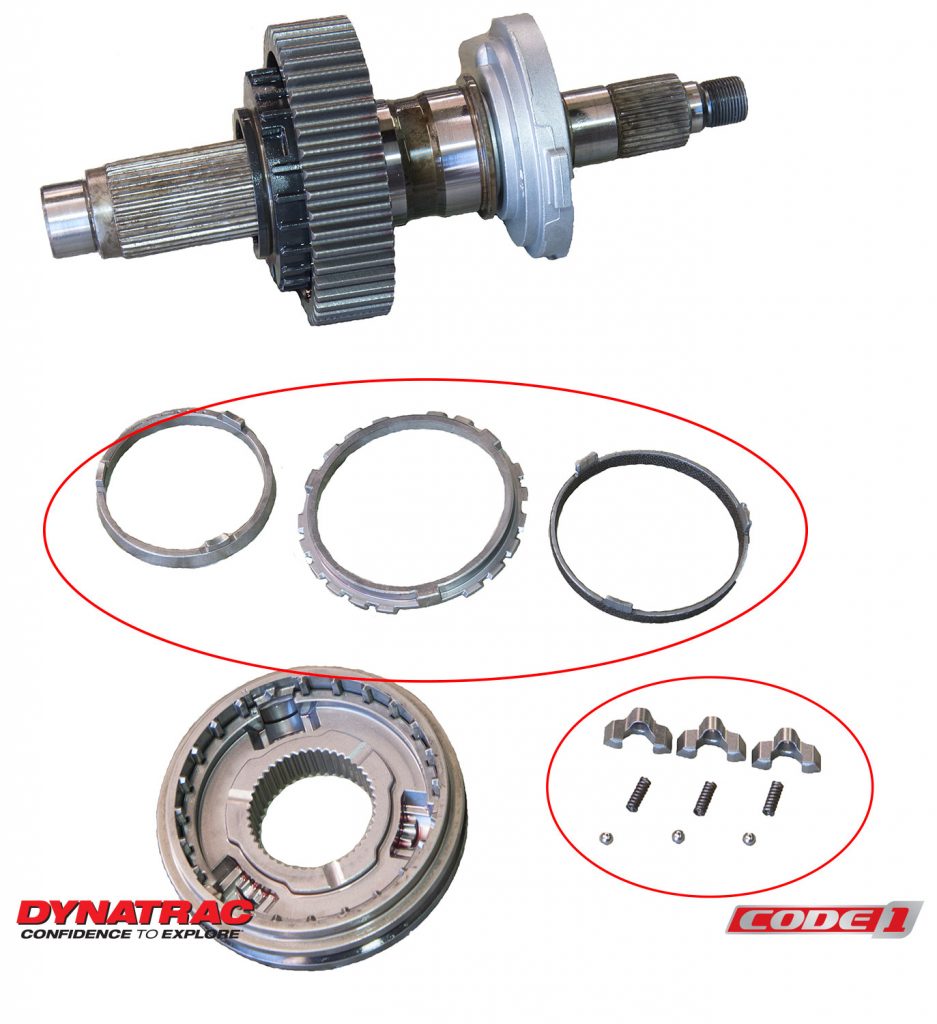 Here are the disassembled parts of the synchronizer laid out. You will discard all of the components circled in red: the synchronizers, detents, springs and check balls.
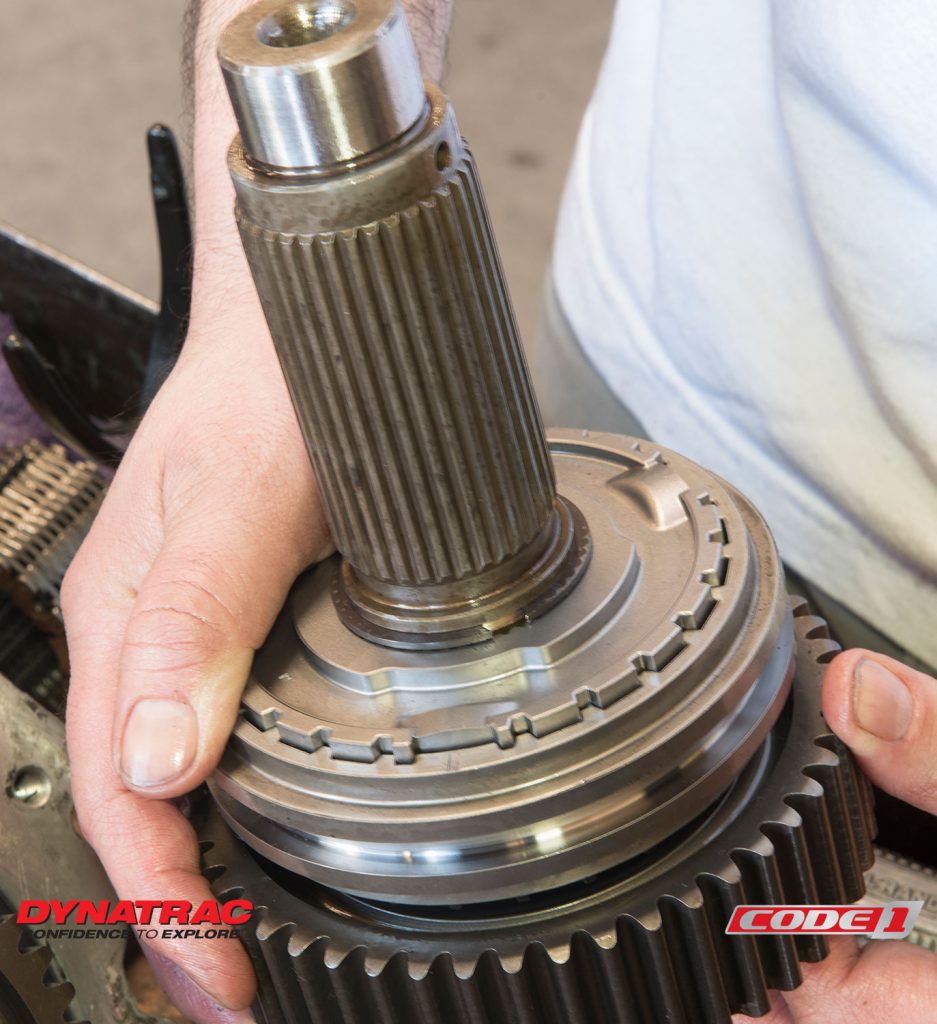 Re-assemble the remaining components on the shaft and install the C-clip.
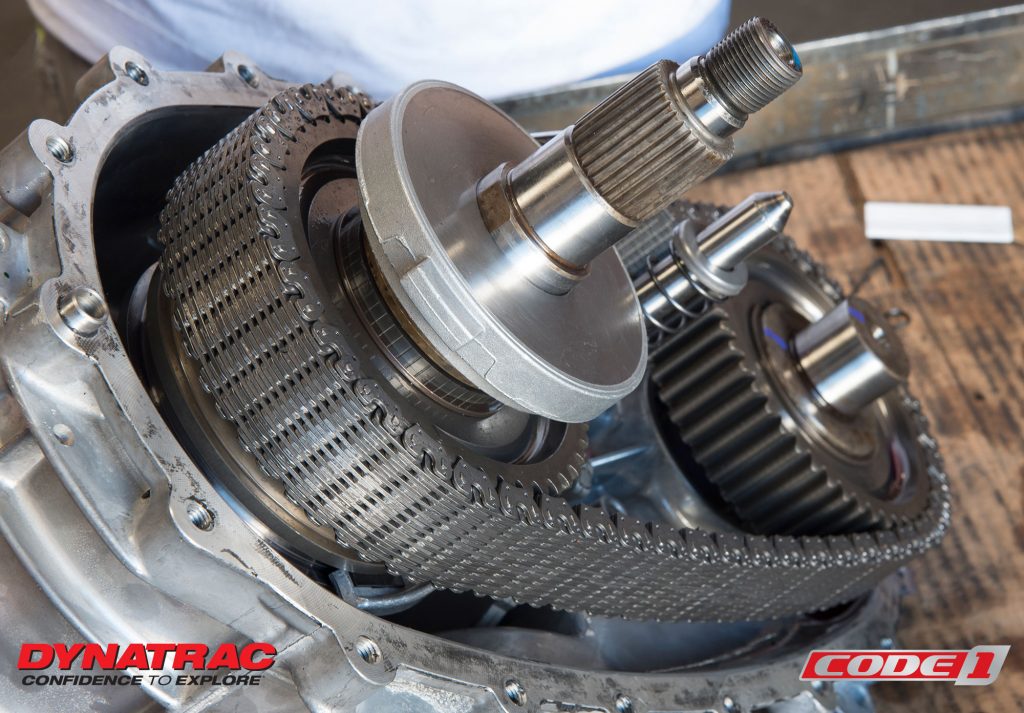 Slip the drive chain over the shaft and slide the shaft into the case. You will need to rotate the shaft, helping it to drop down fully into the case. When the shaft is fully seated, the drive chain will be parallel with the machined case mating surface, making it straight across to the output shaft.
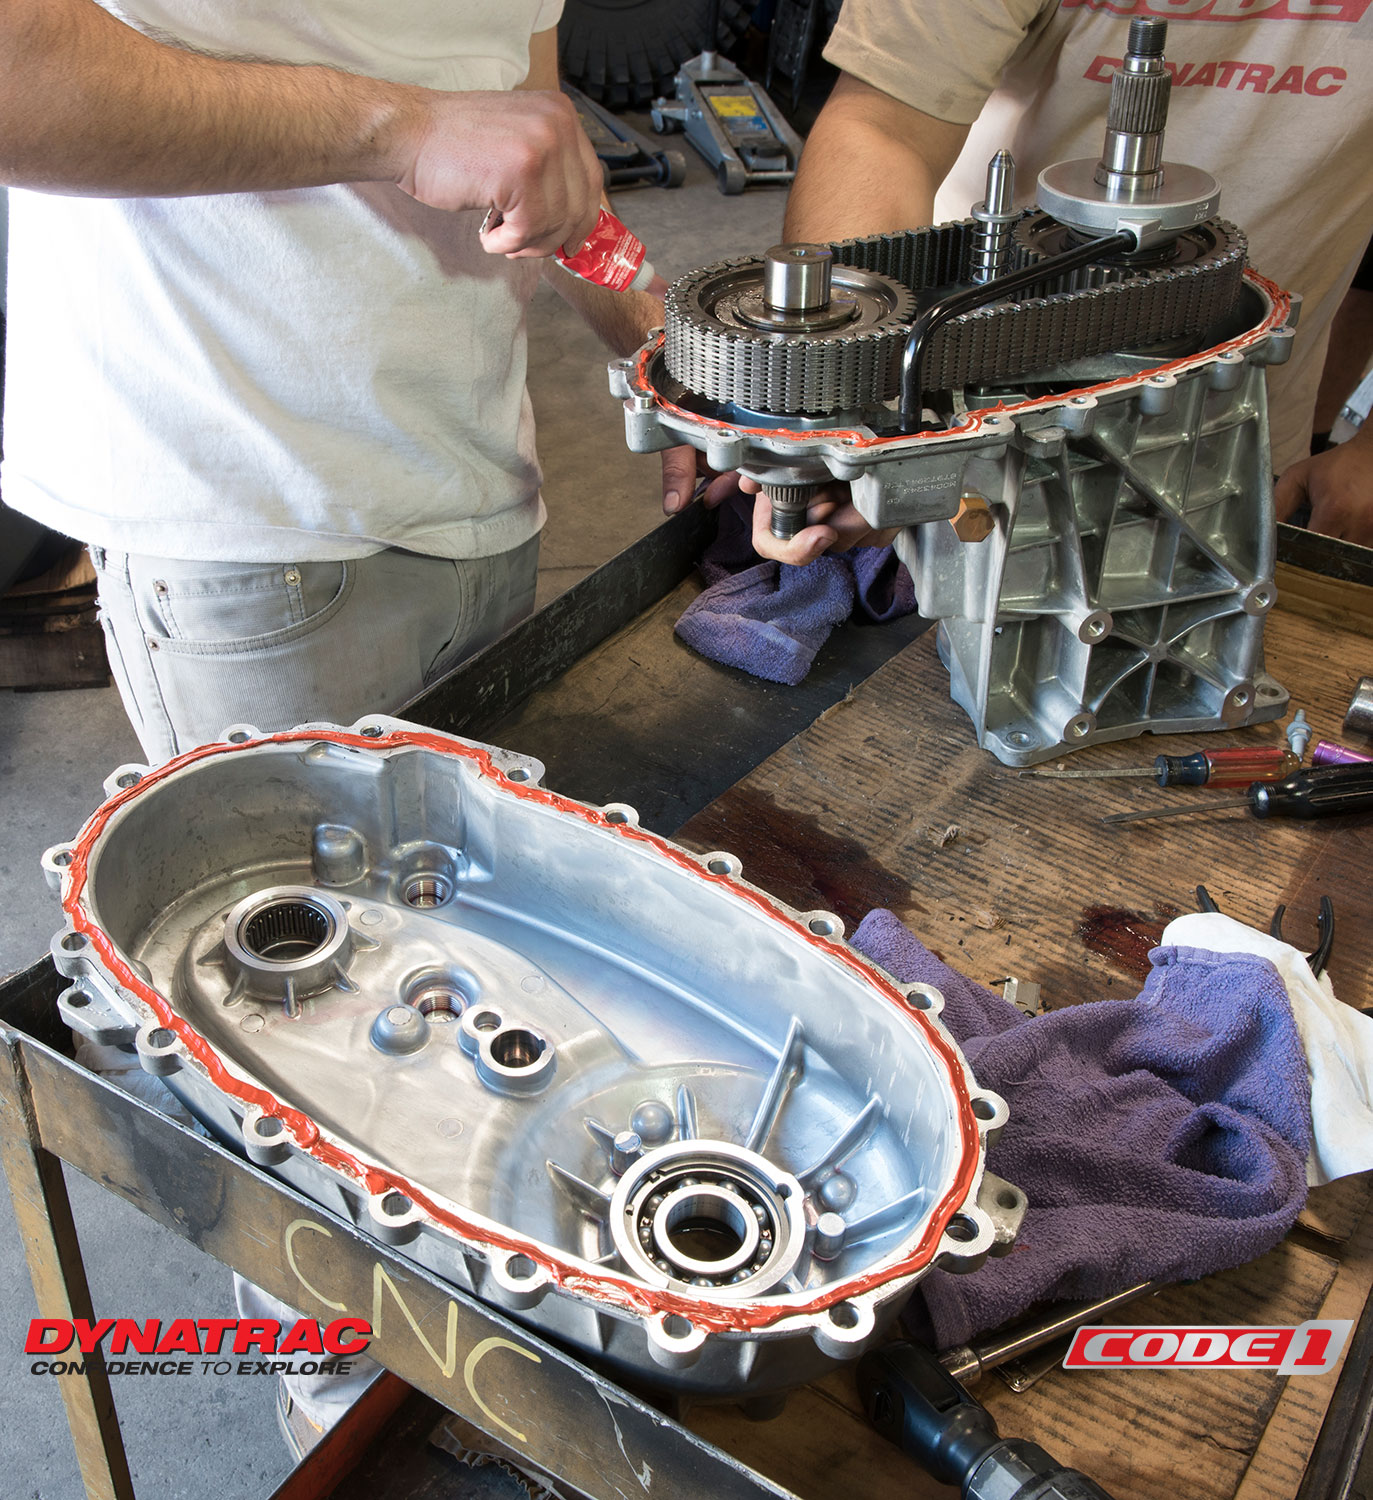
 Clean the mating surfaces of both halves of the transfer case. Use a high-temperature RTV silicon. We recommend applying a moderate bead to both halves, let the silicon become tacky and then bolt the two halves back together. At that point, the transfer case is ready to be installed back into the Jeep JL.
 To perform this modification, you will need to remove the transfer case from the vehicle and drain the fluid. You may be able to perform this modification without moving the transfer case from the vehicle, as long as you can separate the two halves of the case. If you remove the transfer case from the vehicle, the upper bolt on the driver side is behind a cooler and is extremely difficult to remove. We trimmed a 10mm wrench to fit on the bolt. With the transfer case removed from the vehicle, remove all of the bolts that hold the two halves of the case together.
 The shift fork and spring, as well as the mainshaft and drive chain will likely come out of the case when the two halves are separated. The mainshaft is the assembly that will require further disassembly.
 Remove the C-clip that retains the synchronizer assembly on the shaft.
 Slide the sleeve, blocker ring, intermediate ring and engagement ring off of the shaft.
 Here are the disassembled parts of the synchronizer laid out. You will discard all of the components circled in red: the synchronizers, detents, springs and check balls.
 Re-assemble the remaining components on the shaft and install the C-clip.
 Slip the drive chain over the shaft and slide the shaft into the case. You will need to rotate the shaft, helping it to drop down fully into the case. When the shaft is fully seated, the drive chain will be parallel with the machined case mating surface, making it straight across to the output shaft.
 Clean the mating surfaces of both halves of the transfer case. Use a high-temperature RTV silicon. We recommend applying a moderate bead to both halves, let the silicon become tacky and then bolt the two halves back together. At that point, the transfer case is ready to be installed back into the Jeep JL.